EUR
EUR USD
USD JPY
JPY GBP
GBP CNY
CNYCable Management 101: A Clean Desk in 5 Steps
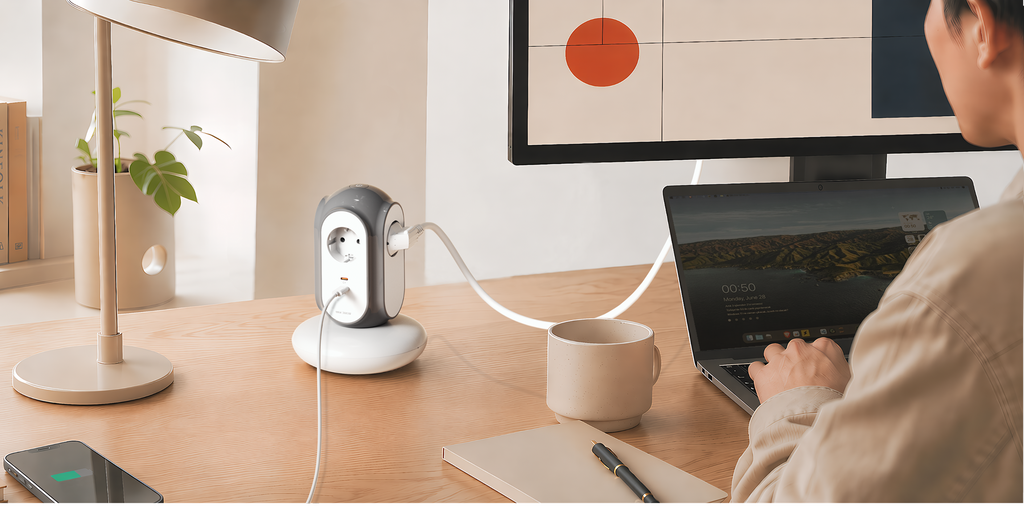
Look under your desk. If you see charging cables, power cords, display cables, and adapters crossing over one another, you are not alone.
Cable clutter is more than a visual problem. It makes cleaning harder, makes individual cables more difficult to identify, and can turn a simple device change into an unnecessary project.
The good news is that cable management is usually a one-time setup. Spend an hour creating a clear structure, and future changes become much easier.
Step 1: Unplug Everything and Audit Your Cables
Before buying trays, clips, or sleeves, start by understanding what is actually connected to your desk.
Unplug each cable and sort it into three groups:
- Permanent: Monitor power, display cables, desk lamps, and other connections that rarely move.
- Semi-permanent: USB hubs, Ethernet cables, docks, and chargers that change occasionally.
- Daily access: Phone chargers, laptop power cables, and anything you regularly connect or disconnect.
Store or remove cables that no longer serve a device in your current setup. Fewer cables make every later step easier.
Step 2: Add an Under-Desk Cable Tray
An under-desk cable tray creates one dedicated place for the power strip, excess cable length, and larger adapters.
Mesh metal trays are useful because they provide airflow and make it easy to secure cables with reusable ties. Depending on the desk, you can choose screw-mounted, clamp-mounted, or adhesive options.
Position the tray close enough to the rear of the desk that monitor and peripheral cables can enter naturally without creating long visible loops.
The power strip itself also affects how much space the tray requires. A vertical tower design concentrates outlets upward instead of spreading them across a long horizontal strip, which can make cable routing easier in compact setups.
The MiaoLab Tower Power Strip combines four AC outlets with two USB-C ports in an upright form, making it easier to keep multiple connections close to one central power point.
Step 3: Route Cables Toward One Exit Point
Once everything reaches the tray, route the remaining cables toward one exit point—usually the rear center of the desk or the corner closest to the wall outlet.
Use adhesive clips along the underside of the desk to guide individual cables and reusable hook-and-loop ties to bundle cables that travel in the same direction.
Reusable ties are generally easier to adjust than permanent zip ties, especially if you frequently change monitors, chargers, or peripherals.
For a standing desk, leave enough slack for the full height range and consider a flexible cable spine between the desk and floor. The cable path should be able to move freely without pulling on plugs or connectors.
Step 4: Reduce Visible Cables on the Desktop
From the seated position, aim to keep only the cables you actually need to access.
- Use monitor-arm cable channels: Many monitor arms can guide display and power cables along the arm and behind the desk.
- Go wireless where it makes sense: A wireless keyboard or mouse can reduce visible desktop cables, provided charging remains convenient.
- Use a USB-C dock: For compatible laptops, a dock can consolidate display, power, networking, and peripherals into a single connection to the computer.
- Use a desk grommet: A small opening or grommet lets charging cables appear only where they are needed instead of crossing the entire desktop.
The goal is not absolute invisibility. A cable that is easy to access and neatly routed is often better than one hidden so completely that replacing it becomes difficult.
Step 5: Label Both Ends and Leave Some Slack
Once the layout is complete, label both ends of cables that are difficult to identify. A small tag marked “monitor,” “dock,” or “lamp” can save time months later.
Also leave a small amount of slack at each connection. Cables pulled completely tight can place unnecessary strain on connectors when a monitor moves or a standing desk changes height.
A gentle service loop gives the setup room to move while keeping the cable path organized.
What You May Need
You do not need every accessory below. Choose only what solves a real problem in your setup.
| Item | Purpose | Typical Price Range |
|---|---|---|
| Under-desk cable tray | Holds the power strip, adapters, and excess cable length | $15–25 |
| Vertical tower power strip | Creates one compact power and charging point | $30–55 |
| Reusable cable ties | Bundles cables while remaining easy to reopen | $6–10 |
| Adhesive cable clips | Guides individual cables along the underside of the desk | $5–8 |
| Cable spine | Provides a flexible desk-to-floor cable path for standing desks | $15–25 |
The Result: A Desk That Is Easier to Use
When the setup is finished, the biggest improvement is not simply that fewer cables are visible.
The power strip has a clear location. Adapters are no longer scattered across the floor. Each cable has a route. Cleaning under the desk becomes easier, and adding or replacing a device no longer requires tracing an entire bundle from scratch.
A clean cable layout reduces small everyday friction. You sit down, connect what you need, and the desk works the way you expect it to.
Build a cleaner power setup:
Explore the MiaoLab Tower Power Strip →
Frequently Asked Questions
What is the easiest way to start cable management?
Begin by unplugging and sorting every cable. Removing unused cables and identifying permanent versus frequently accessed connections makes the rest of the setup much easier.
Do I need an under-desk cable tray?
No, but a tray is one of the easiest ways to keep a power strip, adapters, and excess cable length together and off the floor.
Are reusable cable ties better than zip ties?
For most desk setups, reusable hook-and-loop ties are more convenient because they can be opened and adjusted whenever devices change.
How should I manage cables on a standing desk?
Leave enough slack for the desk's full height range and use a flexible cable spine or movable routing system so cables are not pulled tight as the desk rises.
Should I hide every cable?
No. Frequently accessed cables should remain easy to reach. The goal is a clear and intentional cable route, not making maintenance difficult.
Where should a power strip go in a clean desk setup?
Place it somewhere dry, ventilated, stable, and easy to access. An under-desk tray or secure shelf can work well if the strip remains within its rated electrical capacity.
Can a USB-C dock reduce cable clutter?
Yes, when the laptop and peripherals are compatible. A dock can consolidate display, power, network, and accessory connections into fewer cables at the computer.
How much slack should I leave in desk cables?
Leave enough for normal movement without creating large hanging loops. Standing desks require additional slack so cables are not strained at maximum height.